Master Quick Pan-Searing Techniques for Fresh Vegetables
Transform your vegetable cooking with fast, flavorful pan-searing methods that beat traditional roasting every time.

When it comes to preparing vegetables for the dinner table, most home cooks gravitate toward roasting—a reliable method that requires minimal attention. However, an equally valuable technique deserves far more recognition: high-heat pan-searing. This approach transforms ordinary vegetables into restaurant-quality side dishes in a fraction of the time, delivering concentrated flavors and superior textures that roasting simply cannot match.
Pan-searing works through direct contact with a hot cooking surface, creating a golden crust while preserving the vegetable’s natural juices and delicate qualities. Whether you’re preparing a weeknight dinner or hosting guests, mastering this technique will elevate your kitchen skills and expand your repertoire of quick, elegant sides.
Why Pan-Searing Outperforms Traditional Roasting
Roasting has dominated home kitchens for decades, and with good reason—it’s forgiving and hands-off. Yet pan-searing offers distinct advantages that make it worth incorporating into your regular cooking routine.
The primary benefit is speed. While roasting typically requires 20-30 minutes at high temperatures, pan-searing accomplishes similar results in 5-10 minutes. This makes it ideal for busy weeknights when you need a nutritious side dish without extended oven time.
Second, pan-searing creates superior crust development through the Maillard reaction—the chemical process that occurs when proteins and sugars expose to intense heat. This reaction generates complex, savory flavors that roasting, with its dry heat and longer cooking time, cannot replicate as effectively. The result is a vegetable that tastes deeper and more intentional.
Third, pan-searing offers better control over cooking stages. You can monitor doneness visually and adjust heat instantly, preventing overcooking. With roasting, vegetables often soften unevenly, with outer edges drying while centers remain firm.
Finally, pan-searing consumes far less energy than preheating and operating an oven, making it an economical choice for individual or small servings.
Essential Equipment and Temperature Management
Success with pan-searing depends significantly on your equipment choices and heat control. Understanding these fundamentals eliminates guesswork and ensures consistent results.
Selecting the Right Pan
Heavy-bottomed pans distribute heat evenly and prevent hot spots that can char vegetables unevenly. Stainless steel pans work excellently for searing, as do cast iron skillets once properly seasoned. Non-stick pans are useful but often cannot withstand the high temperatures necessary for proper crust development, and their non-reactive surfaces don’t interact with ingredients the way traditional pans do.
Pan size matters too. A crowded pan traps steam and prevents proper browning, so choose a skillet large enough to arrange vegetables in a single layer with minimal overlap. A 10-12 inch pan accommodates most home cooking needs.
Understanding Heat Levels
Medium-high heat represents the sweet spot for most vegetables. This temperature allows sufficient crust development without burning external layers before interiors cook through. If your garlic starts browning too rapidly, slightly reduce heat to prevent scorching while allowing vegetables to finish cooking.
Preheat your pan for 2-3 minutes before adding oil and vegetables. A properly heated pan makes an audible sizzle when oil contacts the surface—a signal that cooking can begin.
Preparing Asparagus for Perfect Pan-Searing
Asparagus’s delicate structure and mild flavor make it ideal for pan-searing, though proper preparation is essential.
Trimming and Cutting Techniques
Begin by removing woody base ends. You can snap them by hand—asparagus naturally breaks at the tender-woody junction—or use a knife to cut approximately 1-2 inches from the base. This removes the tough, fibrous sections that refuse to soften regardless of cooking time.
For uniform cooking, cut trimmed spears on the diagonal into 2-inch pieces. Diagonal cuts increase surface area for browning and create more elegant presentation than straight cuts. If you prefer larger pieces, cut spears into thirds, reserving the tender tips for final cooking stages so they don’t overcook.
The Searing Process
Heat 1-2 tablespoons of oil in your skillet over medium-high heat. Once the oil shimmers, add asparagus pieces in a single layer and refrain from stirring for 2-3 minutes. This undisturbed cooking allows the bottoms to develop color. After initial searing, stir and cook another 2-3 minutes until all pieces achieve light char marks and crisp-tender texture.
Season with salt and pepper, then transfer to a serving plate. Properly seared asparagus retains a slight crunch while remaining tender enough to cut without resistance.
Mastering Mushroom Preparation and Cooking
Mushrooms present unique challenges because they release significant moisture during cooking. Understanding this behavior prevents soggy results and ensures golden, caramelized exteriors.
Preparation Methods
Clean mushrooms gently with a damp paper towel rather than rinsing them, as they absorb water readily and become waterlogged. Remove stems and quarter or slice caps depending on size—baby bella mushrooms can be quartered, while larger varieties work better sliced into ½-inch thickness.
Pat mushrooms dry with paper towels immediately before cooking. This removes surface moisture and facilitates browning.
Sequential Cooking for Optimal Results
Cook mushrooms separately before adding asparagus. This sequencing allows you to drive off their moisture completely, achieving golden-brown color rather than gray steamed appearance.
Heat 1-2 tablespoons oil over medium-high heat and add mushrooms in a single layer. Let them cook undisturbed for 3-4 minutes until golden brown on the bottom, then stir and cook another 2 minutes until edges are caramelized and any remaining liquid has evaporated. Season with salt and transfer to a plate.
If preparing mushrooms and asparagus together, ensure mushrooms reach proper doneness before combining with asparagus, which requires less cooking time.
Building Flavor Through Aromatics and Seasonings
While vegetables themselves provide foundational flavors, strategic use of aromatics and seasonings transforms them into memorable dishes.
Garlic and Onion Foundations
Begin cooking by adding minced garlic to hot oil, stirring constantly for about 1 minute until fragrant. The brief cooking time develops garlic’s sweet, complex notes without allowing it to brown and turn bitter. If preparing mushrooms and asparagus together with garlic, add garlic first, then mushrooms, allowing both to develop flavor together before adding faster-cooking asparagus.
Red onion adds sharp, slightly sweet notes that complement earthy mushrooms beautifully. Mince onion finely and sauté for 1 minute over medium heat to soften its raw pungency before adding other vegetables.
Herb and Acid Finishing Touches
Fresh herbs like thyme, chives, and parsley brighten finished dishes without overwhelming delicate vegetable flavors. Add hardy herbs like thyme early in cooking so their oils infuse throughout, while tender herbs like chives get scattered at the very end to preserve their fresh character.
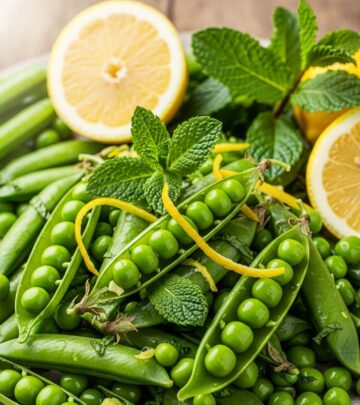
Acid—particularly lemon juice and zest—enhances the inherent flavors of vegetables. Add lemon juice after cooking concludes so its brightness remains prominent rather than muting during heat exposure. Lemon zest contributes aroma and visual appeal with minimal liquid addition.
Toasted nuts like almonds provide textural contrast and subtle richness that completes the dish.
Handling Leafy Greens Through Pan-Searing
Leafy greens like chard require slightly different approaches than firmer vegetables due to their delicate structure and high water content.
Remove tough center ribs from chard leaves, chopping stems and leaves separately. Stems require longer cooking, so add them to the pan first with oil and aromatics. After 2-3 minutes, add the more delicate leaves, which wilt within 1-2 additional minutes.
The high moisture content of greens means you’ll achieve adequate liquid without adding water. Rather than seeking the golden browning characteristic of asparagus or mushrooms, aim for vibrant color retention with slight wilting. Season generously as greens diminish significantly during cooking.
Practical Timing Guide
Knowing typical cooking times prevents both undercooked and overdone vegetables:
- Garlic and aromatics: 1 minute or less
- Mushrooms (alone): 5-8 minutes for complete browning
- Asparagus (alone): 3-4 minutes for crisp-tender texture
- Combined mushrooms and asparagus: 8-10 minutes total (mushrooms first, asparagus added partway through)
- Chard stems: 2-3 minutes before adding leaves
- Chard leaves: 1-2 minutes after adding stems
- Finishing with lemon/herbs: 30 seconds of gentle tossing
Common Mistakes and How to Avoid Them
Understanding pitfalls helps you troubleshoot problems and refine your technique:
Overcrowding the pan: This creates steam rather than sear, resulting in pale, mushy vegetables. Always use adequate pan space and cook in batches if necessary.
Stirring too frequently: Constant stirring prevents crust development. Resist the urge to move vegetables around; allow them 2-3 minutes of undisturbed heat before stirring.
Insufficient heat: Weak heat produces steamed rather than seared vegetables. Ensure your pan is adequately preheated and that you’re using medium-high rather than medium heat.
Excessive moisture: Wet vegetables steam rather than brown. Pat mushrooms dry and ensure greens are properly drained before cooking.
Burnt aromatics: Adding garlic to an excessively hot pan causes burning. Either reduce heat slightly before adding garlic or add garlic after mushrooms have already begun cooking.
Frequently Asked Questions
Can I use butter instead of oil for pan-searing?
Yes, butter adds wonderful flavor and richness. Use 1-2 tablespoons per batch. Butter has a lower smoke point than oil, so keep heat at medium to medium-high rather than high. Clarified butter (ghee) tolerates higher heat than regular butter.
What oil works best for high-heat cooking?
Olive oil remains popular and flavorful for medium-high heat cooking. Avocado oil, grapeseed oil, and refined vegetable oils tolerate even higher temperatures if needed. Avoid extra-virgin oils at high heat, as their lower smoke points cause unpleasant burnt flavors.
How do I achieve the perfect crisp-tender texture?
Test doneness by biting a piece—it should offer slight resistance with a tender interior rather than being fully soft or remaining completely crunchy. Cooking times vary based on piece size and your specific stove, so begin checking around the 3-minute mark.
Can I prepare vegetables ahead of time for quick cooking later?
Yes, trimming and cutting vegetables hours in advance saves time. Store prepared vegetables in airtight containers in the refrigerator. Pat mushrooms dry immediately before cooking to prevent moisture absorption.
What temperature should I serve finished vegetables at?
Serve pan-seared vegetables immediately while they’re hot and retain their texture. Holding them warm causes continued cooking and softening. If you must hold them, place in a warm serving dish rather than over direct heat.
Integration into Your Cooking Routine
Pan-searing works beautifully as a side dish alongside proteins like grilled chicken, roasted fish, or seared steak. The concentrated flavors and quick preparation time make vegetables feel like intentional components of the meal rather than afterthoughts.
These techniques also shine in grain bowls, pasta dishes, and composed salads. Cook vegetables slightly less than completely tender when planning to combine them with other components, as any additional handling and heat exposure will soften them further.
By mastering pan-searing, you’ve gained a technique that works year-round, adapts to seasonal availability, and consistently delivers impressive results. Whether you’re cooking for yourself or entertaining guests, this approach brings restaurant-quality vegetable preparation into your everyday kitchen repertoire.
References
- Sauteed Asparagus and Mushrooms — Mirlandra’s Kitchen. Accessed April 2026. https://www.mirlandraskitchen.com/sauteed-asparagus-and-mushrooms/
- Sauteed Asparagus and Mushrooms Recipe — Mom Foodie. Accessed April 2026. https://momfoodie.com/sauteed-asparagus-and-mushrooms/
- Sauteed Asparagus with Mushrooms (Made in One Skillet!) — Hip Hip Gourmet. Accessed April 2026. https://hiphipgourmet.com/sauteed-asparagus-with-mushrooms/
- Sauteed Asparagus and Mushrooms — Salu Salo Recipes. Accessed April 2026. https://salu-salo.com/sauteed-asparagus-mushrooms/
- Sautéed Asparagus and Mushrooms — Katie’s Cucina. Accessed April 2026. https://www.katiescucina.com/sauteed-asparagus-and-mushrooms/
- Sautéed Asparagus and Mushrooms – Delightful Plate — Delightful Plate. Accessed April 2026. https://delightfulplate.com/sauteed-asparagus-with-mushrooms/
- Sautéed Asparagus and Mushrooms — Kitchen At Hoskins. Accessed April 2026. https://www.kitchenathoskins.com/asparagus-and-mushrooms/
Similar Articles


Read full bio of medha deb